Becoming a Tuleap Citizen
You can learn more about the various class of Tuleap citizens in the dedicated section (see Type of users).
User Registration
As suggested above, the first thing to do for newcomers is to create their own account on Tuleap. Becoming a registered Tuleap user doesn’t imply any commitment on your part to host any of your software projects on Tuleap. It simply gives you more freedom when you browse the site and allows Tuleap to provide you with personalized information.
Registering on Tuleap is quick and easy:
Select the “New User” link
Give the following information (all items marked with an asterisk are mandatory):
Login Name: your user name. On some Tuleap systems that are connected to an enterprise directory, you may have to use a pre-defined user name.
Password: 6 characters minimum, type it twice to make sure you didn’t make any typo
Full Real Name: what’s your name again?
E-mail Address: depending on the site configuration valid email addresses may be limited to those in the SYS_ORG_NAME domain (or SYS_ORG_NAME affiliated domains). Make sure your email address is correct or you won’t receive the registration confirmation message in your mailbox and won’t be able to complete the registration process.
Time Zone: choose the time zone you live in. Choosing the correct time zone is really important. Behind the scene Tuleap stores all time stamps in GMT time. Choosing the right time zone allow s Tuleap to translate all time stamps to your local time on the Web pages.
Site Updates: check this box if you want to receive site updates from the Tuleap Team. This is a low traffic distribution list and we strongly advise you to check this box (default). You’ll receive e-mail from us about the site maintenance, the important event in the life of the site, Tuleap presentation/training announcement and the Tuleap newsletter.
Additional Community Mailings: check this box if you want to receive notification about less important events. You can safely check this box as well if you want because we seldom use it. So we assure you that you won’t be overwhelmed with tons of e-mail.
Shortly after you validate the registration form you will receive a message in your mailbox which includes a URL. Clicking on this URL will bring you to a Tuleap form asking for your login/password again. If they match then your account is validated and you are now logged into the Tuleap site.
Note
Your Tuleap server might be set up to use an external LDAP directory for authentication. In this case, the registration phase is even simpler: simply type your LDAP login and password, and the system will automatically extract most of the required information from the LDAP directory: email address, real name, etc.
This 3 step registration process has been put in place for security reasons. Assuming people create their account with an alien e-mail address while they have access to the Intranet, they won’t be able to validate their account from the outside because the Tuleap machine is behind the firewall. Therefore, an account cannot be validated from the outside.
Note
Don’t panic and, above all, do not create a new account! Go to the Tuleap Login Page and click on the [Lost your password?] link. You’ll be asked your login name and from that Tuleap will send you an e-mail message with an embedded URL. Click on this URL and give your new password.
And what if I loose both my login and password? Gee! In this case use the search box and, assuming that you gave your full real name when you first registered, search for your last name and see if you can find your login again in the list of selected users. If so, apply the previous procedure. If not then contact us!
Login and Personal Page
To log into the Tuleap site, go to the Tuleap Site and click on the “Login” link. If you typed your login and password correctly, Tuleap displays your Personal Page (or Personal Dashboard). At any point in time you can return to your Tuleap Personal Page by clicking on your avatar or user name.
User Dashboard Content
A sample user dashboard is available below. The page is split in several areas:
The header with your user name and avatar
A navigation bar to access to each dashboard. This is where you can add a new dashboard, and edit or delete a dashboard. You can also add widgets to the current dashboard.
The various information presented by widgets.
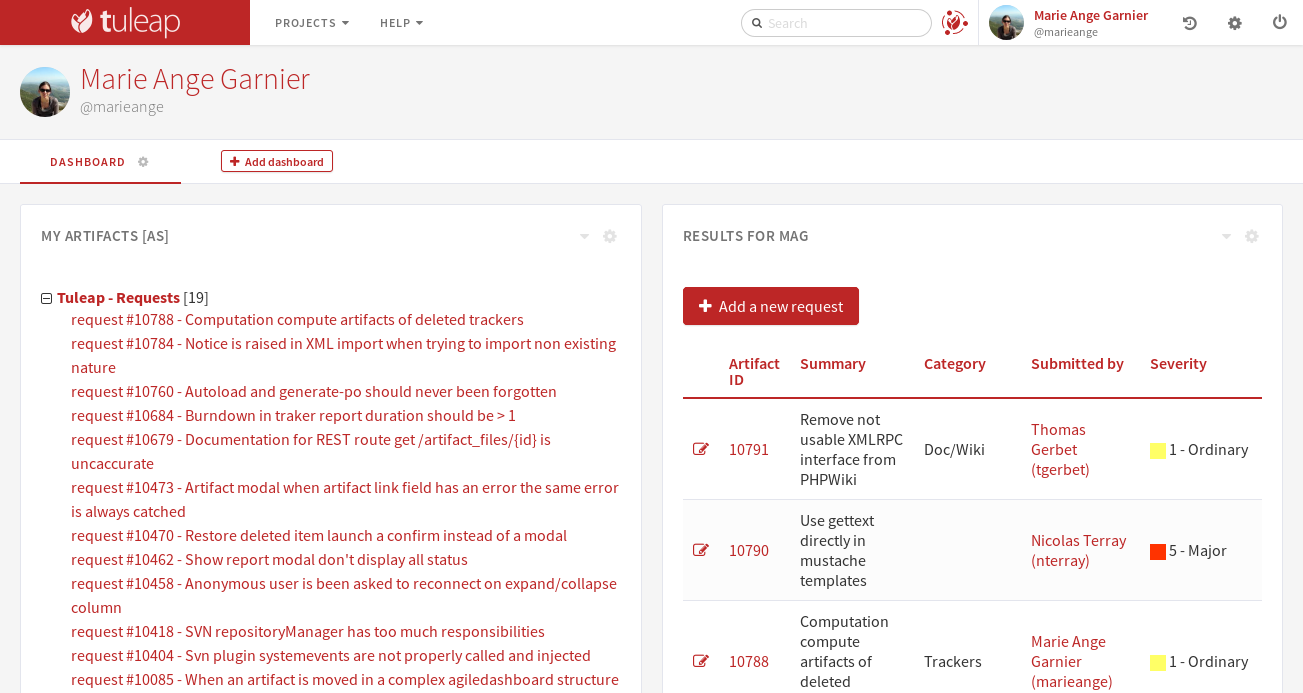
Tuleap allows you to personalize your dashboards. Your dashboard is personal, nobody except you can access it. The content of the page is made of widgets. All widgets can be moved, collapsed or removed. Some of them can provide an rss feed or be edited.
New widgets can be added through the dropdown entry “Add widget”. Here is an example of available widgets for the user dashboard:
My Artifacts lists artifacts you have submitted or assigned to you, by project.
My Projects lists the projects you belong to. Selecting any of these projects brings you to the corresponding Project Dashboard.
Monitored File Packages lists packages that you are currently monitoring, by project. To cancel any of the monitored items just click on the trash icon next to the item label.
RSS Reader allows you to include public rss (or atom) feeds into your personal page.
Account Maintenance
You provided a certain amount of demographic information to Tuleap when you first registered on the Tuleap site. This and other information can be modified at any time by clicking on the “cog” image near your user name.
Most of the items on the “My Account” page will look obvious to you. However, we would like to draw your attention on some of them:
Add an avatar by clicking on the image at the top left of the page.
Change your password or email adress.
SSH shared keys: this one has to do with the Shell Account service. When you are a registered user, the Tuleap server gives you a personal shell account with the same login/password as for the Web interface. To automate the shell login you can share a public encryption key with Tuleap and use the secure shell SSH to access Tuleap instantly without having to type a password. More on that in Shell Account
Your public key(s) here and they will be placed on the server in your ‘~/.ssh/authorized_keys’ file. To generate a public key, run the program ‘ssh-keygen’ (or ssh-keygen1) on your desktop machine. Then look at the file ‘~/.ssh/identity.pub’ where the generated public key has been stored. Read the ssh documentation for further information on sharing keys.
Your preferences are available at the right of the page. Here are some of the preferences you can define:
Remember my Login/Password: by default your current login session on Tuleap is terminated whenever you stop your Web browser. When you restart your browser and visit Tuleap you will be asked for your login/password again. By checking this box you ask Tuleap to remember about your login/password forever or at least until you explicitly select the “Logout” item in the Tuleap Main Menu. For security reasons we do not recommend using this feature unless you are equipped with a strictly personal desktop machine
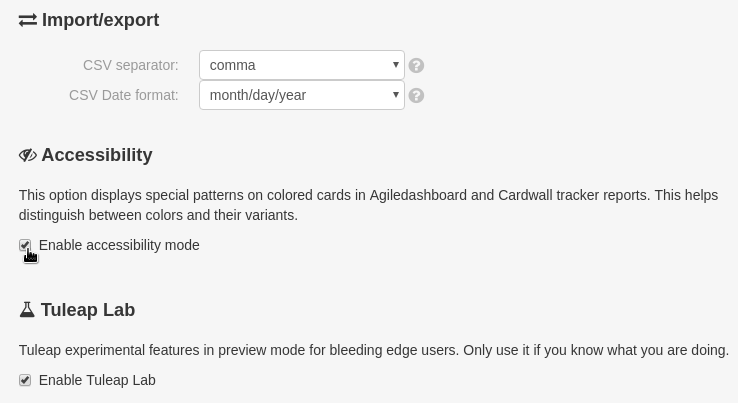
CSV separator: Tuleap provides you export and import functionalities (See Project Data Export for details). The import/export format is CSV format. Like CSV norm is not implemented by the same way in each software, we allow you to change the CSV separator, in order to fit with your preferred software! The available separators are:
comma (,) : the default separator.
semicolon (;) : used by default by the french version of Excel.
tab (tab).
CSV date format: Tuleap provides export and import functionalities (See Project Data Export for details). The import/export format is CSV format. Like CSV norm is not implemented by the same way in each software, we allow you to change the CSV date format, in order to fit with your preferred software! The available formats are:
month/day/year : the default format (generally used in United States).
day/month/year : used by default by the french version of Excel.
This format will be used to generate the exported artifacts, and will also be used when importing. Then, don’t forget to check your dates value before importing. They should be the same format as defined in your preferences.
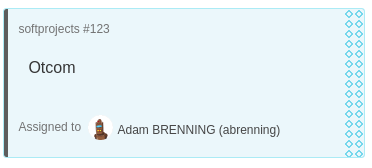
Accessibility: Enabling this option will show special patterns on cards that have a background color (see Cards semantic). Cards in Agile dashboard and Cardwall trackers will display the accessibility pattern. This helps distinguish between colors.
- Activate the Lab mode: give access to features in preview. This is for advanced users who
know what they are doing.